If any product supplied by ARC Lighting is found to be defective in material or workmanship, within its warranty period, you can file a warranty claim. All warranty claims must be submitted through an authorized dealer by our Master Distributors.If you purchased the product from a dealer, please contact the dealer in regards to your warranty claim.
Please file your warranty claim online. We will process your warranty claim and give you feedback within 48 hours.
ONLINE WARRANTY REQUEST https://arc.lighting/warranty-claim/
Or you can send us an email at [email protected] indicating:
If your warranty claim is approved. An RMA number will be issued. You can then ship the defective part(s) back to the dealer that you purchased the products from. All the defective parts will be returned to us by the dealers. Go Performance will verify that the defect was not caused by negligence, abuse, unauthorized repair or disassembly. Pacesetter will determine whether the product will be repaired or replaced. Replacement products will be shipped out by our Master Distributor.
Please find the details of the Limited Warranty.
The new metal POP display has been updated by learning from years of field use and experience. The new display includes a 110v AC volt power supply connected to the RapidAim and Xtreme bulbs. It can be used to demonstrate the power and brightness of Concept and Xtreme bulbs. Also provided are leads with alligator clips used to test the bulbs for normal operation.
On a few units, we found that the Xtreme bulb polarity had been switched. Its a simple fix. Here is a video showing how to handle the adjustment.
Keywords: POP display, Xtreme polarity, RapidAim bulbs, Xtreme bulbs, Concept bulbs, 110v AC power supply, Alligator clips, Bulb testing, Polarity adjustment.
The third generation of the Ford Super Duty 2011-2016 began using the quad headlight system. We have good success with this halogen to LED migration. Then with the model change to the fourth generation 2017-2022 the Ford Super Duty 250-550 initially presented a problem migrating from halogen to LED lights.
The truck uses a quad light system. Each light emitting hole uses an H13 halogen bulb. When a user engages the low or high beams, all four lights brighten or dim. That is an entirely different methodology than most vehicles on the market that have seperate low and high beams. The most common bulbs are H11 and 9005 for high and low.
We were having great success with a simple change of the halogen bulb to our LED H13 upgrade for the 2011 through 2016 model years. Then in 2017, the system changed. We found that the 2019 Ford Super Duty F250-F350 was causing our bulbs to fail. It was the most prominent year to produce that result. It seemed to ramp up and and then after 2021 it tended to dissipate.
Diagnostics – We diagnosed that the vehicle was producing up to 22 volts on our volt meter. Our bulbs were designed to handle 6-16 vDC. The truck was over voyaging our bulbs and causing them to prematurely fail. The addition of decoders did not fix the problem. We asked our contacts about what had changed and finding empirical information failed to yield results. After some time, we concluded the CANbus was modulating electricity. With the ever changing load within the vehicle, it tended to adjust the voltage to the lights.

We spent a few years testing bulbs and decoders and eventually found that with our invention of the RapidAim bulb that was designed to handle 7-40 volts, the problem went away.
At this time, only our RapidAim part #21131 is designed to handle the increased voltage. Once we are comfortable this fix is long term, we will migrate the Xtreme 22131 to the higher voltage rated.
At this time, the 21131 is the only bulb that is approved for the 2017-2022 Ford Super Duty.
Update – We have found that the 2023 and newer Super Duty F250-550 now use an H11 Low (upper hole) and an HB3 (9005) as the High (lower hole).
Condensation is the change of the physical form of water from a gas to a liquid resulting in small droplets of water forming on the inside of the lens. Halogen lights run much hotter than LED lights which also helps evaporate the condensation in lights. Stock halogen headlamps are routinely designed with a vent or built in breather membrane that allows airflow in and out to dissipate condensation. This membrane does not allow water ingress (water leaking into a light).
As the LED produces heat, it does create a slight pressure and temperature differential between the cooler outside air and the warmer air inside the lens. The air moves towards the heat. As LED’s run much cooler that halogen and don’t create enough heat to dissipate the moisture filled air, it can take more time for condensation to dissipate. These are natural causes of condensation and in most cases condensation will dissipate over time. The amount of time it takes for condensation to dissipate depends on the environmental conditions including weather and humidity.
We recommend the use of LED bulbs with a fan cooling system if you experience persistent condensation in your headlights. The fan cooling LED bulbs run on higher temperature and the fan blow the air inside the headlamp housing and boost and evaporation of condensation.
Condensation is a naturally occurring condition that can affect any light. It does not suggest a defect in a product, the housing or sealing of the light. Leaks generally do not occur (which case there is water ingress that could lead to a system failure) during normal LED upgrade. The explanation contained herein is intended to help end users differentiate between these two conditions so they understand what, if anything, needs to be done.

In the rare occurrence where water ingress and leaking is occurring and you have a significant amount of water entering a light or housing, please contact our support team so we can investigate and help you with your case.
Keywords: LED headlights, Condensation, Halogen lights, Breather membrane, Vent, Water ingress, Fan cooling system, Headlight housing, Evaporation, Weather conditions.
We offer two series of LED mini bulbs: Smart Series and Eco Series. Please find how to choose between the two series below:
| PRODUCT SERIES | SMART SERIES | ECO SERIES |
| HYPER FLASH PREVENTION | RECOMMENDED for use in turn signals and any other application with CANBus related errors. SMART series would not require a load resistor to fix hyper flashes. | NOT recommended to use in turn signals and any other application with CANBus related errors. A load resistor would be required to fix hyper flashes. |
| BEST PERFORMANCE | RECOMMENDED if you want to upgrade your tail light or signal light to LEDs. | RECOMMENDED for best for sider markets, back-up lights and license plate light upgrade. |
| BEST VALUE FOR MONEY | RECOMMENDED for easy install (no load resistor required) of front or rear turn signal light upgrade to LEDs. | RECOMMENDED for the best value for money |

The bulb replacement procedure will also be found in your user manual.


#3: Search your vehicle in Year/Make/Model search engine. Use the vehicle search engine on our website. Search by Year, Make, Model or sub model and Qualifier (type of headlamp/fog lamp) your vehicle came with.

Click Search button then select the bulb type on the sidebar on the left. The search result will show you the LED bulb available.

In some vehicles, you may not able to access the light bulbs very easily. In some newer vehicles, you may also need to remove the front bumper cover or even remove the whole headlamp assembly in order to access and change the bulbs.
The Car Care Kiosk Website is a good resource to find videos of how to access and change any vehicle bulb.
STEP 1: Go to the link https://www.carcarekiosk.com/.
STEP 2: Search your vehicle by Make / Model / Year / Engine.

STEP 3: Select the bulb type you are looking to change.

STEP 4: The video will guide you step by step to access and change your light bulbs.

Keywords: change vehicle bulb, access light bulbs, Car Care Kiosk, remove bumper cover, headlamp assembly, vehicle maintenance, bulb replacement guide.
We have two product options for headlight and fog light LED conversion. Please see the guidelines below on how to choose between the CONCEPT and XTREME series:
| PRODUCT SERIES | CONCEPT SERIES | XTREME SERIES |
| DRIVING IN CITY: | RECOMMENDED for everyday city driving with greatly improved style and visibility. Focused beam and precise cut off line create a legal driving beam with zero glare. | NOT recommended to use in your low beam headlight if you are driving mostly in the city. |
| DRIVING RURAL/OFF-ROAD: | Compatible with projector headlamp. Improved brightness than the stock bulb but not as much as HID’s. | RECOMMENDED for its extreme brightness and light range that exceed a 35W HID system |
| LOW BEAM HEADLIGHT: | RECOMMENDED for low beam headlights with focused beam pattern and precise cut off line with zero glare. | Only recommended for low beam headlights if you are driving mostly in rural and off road conditions due to extreme brightness. |
| HIGH BEAM HEADLIGHT: | RECOMMENDED for high beam headlights for focused beam pattern | RECOMMENDED for high beam headlights with supreme brightness and light range |
| PROJECTOR LAMP: | Compatible with projector headlamp. Improved brightness than the stock bulb, but not as much as HID’s. | RECOMMENDED for projector headlamps for brightness equal to 35W HID’s. |
| FOG LIGHTS | RECOMMENDED for perfect fog beam pattern and reliability in inclement weather conditions. | NOT recommended to install in fog lights without dust caps or rubber boots. Excessive elements would affect the life of the fan cooling system. |
| EXTREME TIGHT SPACES | RECOMMENDED for any tight spaces. This bulb is designed to fit in any space a stock bulb would fit. | Fans need to have certain space for airflow to be able to sufficiently cool the LED bulbs. Therefore, if you have very tight space behind the dust caps it is not recommended to use the fan cooled bulb. |
Keywords: LED conversion, CONCEPT series, XTREME series, city driving, rural driving, off-road driving, low beam headlight, high beam headlight, projector lamp, fog lights, tight spaces, vehicle lighting, LED headlight, LED fog light, brightness, beam pattern, headlight alignment
Adjust The Mounting Tab:
Check if the LED bulbs are sitting at the right orientation after you install the bulb. If the bulbs are not in the correct orientation, you can adjust the mounting tab to correct the orientation.
For the Concept Series:
1. Observe the angle of the LED diodes and set to the correct angle if needed.
2. Locate the set screw on the LED bulb collar.
3. Use the hex wrench provided to loosen the set screw.
4. Rotate the collar to the required position to achieve correct installation alignment.
5. Tighten the set screw.

For the Xtreme Series:


If you have ever experienced an oncoming driver who’s lights were blinding you or noticed that your lights tend to illuminate the tops of roadside trees instead of the road, there is a good chance that you are dealing with misaligned headlights.
Correct headlight alignment is extremely important for vehicle safety. Driving with misaligned lights is dangerous, and they should be adjusted as soon as possible. Properly aligned headlights not only light up the road, but they also help illuminate road signs and any animals that might jump out onto the road.
Luckily, adjusting your headlights is a pretty easy fix that most people can handle in their driveway or garage. However, newer vehicles that have halogen or high-intensity bulbs should be taken to a professional for proper alignment.
It is fairly simple to check the alignment of your lights. All you need is a flat surface, a wall to project the lights on, a tape measure, a carpenter’s level, a screwdriver, and some tape. Here are step-by-step directions on how to verify your lights are aligned.

Step 1: Prepare the car.
In order to make sure the car is properly leveled when aligning the lights make sure all the tires are properly inflated, the vehicle has at least a half tank of fuel and there is someone sitting in the driver’s seat. This will ensure that the vehicle is leveled and is reflects common driving conditions when the measurements are taken.

Step 2: Park the car.
Find a flat level surface with a wall in front of it and park the vehicle about 10 to 25 feet from the wall or garage door with the lights aimed at the wall. This distance is optimal as it recreates common conditions out on the road. If you have a flat driveway, the garage door should work well, otherwise consider the ground floor of a parking ramp as it is usually flat, dark and has a wall.
Step 3: Level the car.
Push down all four corners of the vehicle up and down a few times to settle the suspension and make sure the shocks are level.

Step 4: Measure the lights.
Use the tape measure to measure from a fixed point on each of the headlamps down to the ground. The measurements should be within a half inch of each other. This will verify the suspension is not sagging on either side, which would throw off the measurements.
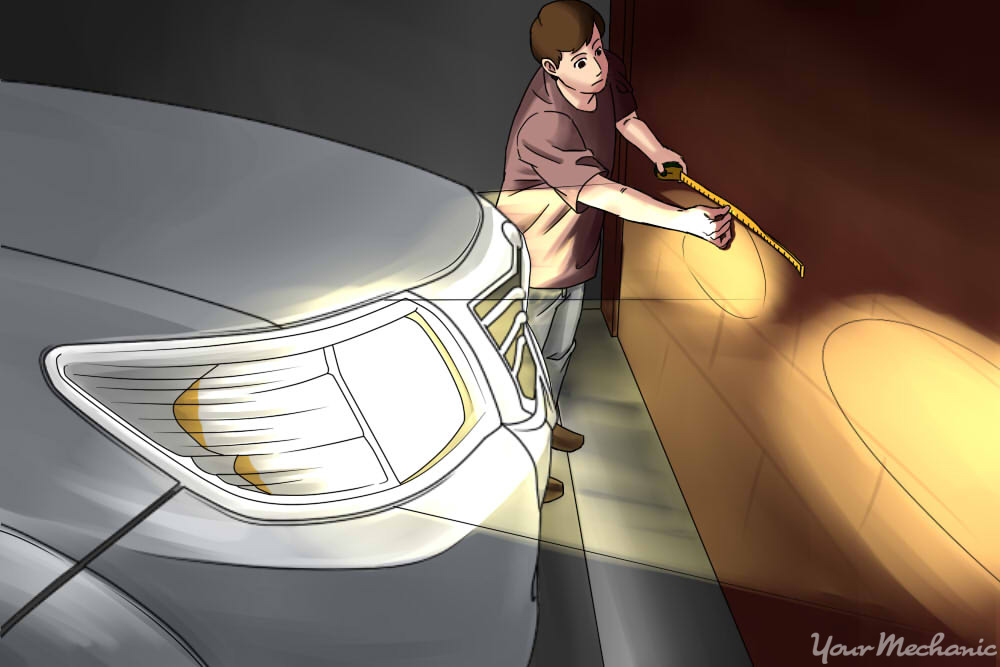
Step 5: Turn on the headlights.
Turn on the lights but do not use the fog lights or high beams. Use the tape to mark both the horizontal and vertical centerlines of the headlight beams.

Step 6: Measure the lines.
The centerlines should not be any higher than 3.5 feet above the ground. Use the carpenter’s level to verify the centerlines from each headlight are even. If the lines are not even, lower the higher mark to the level of the lower one.

Step 7: Back up the car.
The car should now be backed up so it is sitting exactly 25 feet from the wall. This should not be estimated, use the tape measure so the vehicle is exactly 25 feet away.
Now it’s time to make the adjustments to get your lights shining down on the road, where they belong.

Step 1: Find the adjustment screws.
The first thing you need to do is locate the adjustment screws on your vehicle. In many cases, it will be necessary to remove the trim ring from the headlight. Most adjustment screws are located on the top and side of the light housing. They should be clearly marked.
Step 2: Adjust the headlights individually.
If possible, having another person sitting in the driver’s seat that can turn the lights on and off will be a big help. The headlights should be adjusted one at a time. Put a rag or towel over a chair in front of the light you want to block. Covering the light assembly directly can damage the plastic lens – it can get too hot if fully blocked.
Step 3: Adjust the vertical field.
The screw on the top of the light housing should be turned clockwise to raise the lights and counterclockwise will lower the light. The headlight should be adjusted until the top of the most intense part of the light beam shines directly on or just below the center of the tapeline on the wall.

Step 4: Adjust the horizontal field.
The screw on the side of the light housing should now be turned to get the right/left adjustment correct. Adjust the lens so that the most intense part of the beam is to the right of the vertical line.
Step 5: Check manufacturer guidelines.
It is always a good idea to check the manufacturer’s guidelines when adjusting headlights, as there may be very precise specifications that should be followed. This is especially true with the brighter headlights on new vehicles.
Step 6: Test your results.
It’s time to get the vehicle out on the road to make sure the headlights are adjusted properly. This step is important because if you have done the adjustment incorrectly the headlights could be further out of adjustment. Check them on dark road so you can properly judge the adjustment. If they are still not properly adjusted repeat these steps until they correct.
Source of the article: www.yourmechanic.com
by Mark Vallet on January 20, 2016
Keywords: Adjust headlights, Headlight aiming, Headlight adjustment guide, Headlight alignment, Proper headlight adjustment, DIY headlight aiming, Car headlight alignment, Aligning headlights